
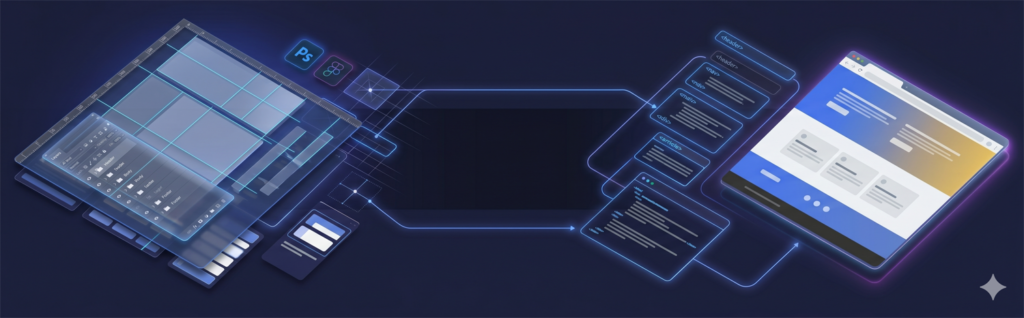
Before you follow a single step below, be honest about the real question most people typing “PSD to WordPress” into Google are actually asking: should I do this myself, or pay someone? This guide gives you the full, unhand-waved process — partly so you can convert a PSD yourself, and partly so you can see exactly what you would be trusting a developer to get right. Either way you will finish this page knowing what “done properly” looks like.
Converting a PSD design to a fully functional WordPress theme is a core web development skill I’ve performed hundreds of times. While Figma has largely replaced Photoshop for new design work, PSD files remain common in enterprise workflows, agency handoffs, and legacy projects. This step-by-step guide walks through the complete conversion process — from opening the PSD in Photoshop to a live, editable WordPress site.
1. What Does PSD to WordPress Conversion Involve?
PSD to WordPress conversion is the process of taking a static Photoshop design file and turning it into a dynamic, content-managed WordPress website. The designer creates the visual mockup in Photoshop — defining layouts, typography, colors, and imagery. The developer’s job is to transform that static image into working HTML, CSS, and PHP code that WordPress can execute.
The process involves several distinct phases: analyzing the PSD structure, exporting assets, writing markup, applying styles, and integrating with WordPress’s PHP architecture. Each phase requires different skills and tools. A developer who cuts corners at the analysis stage will encounter problems at every subsequent step.
Modern PSD to WordPress conversion also requires going beyond pixel-perfect replication. You must decide how each design element maps to WordPress’s content model — what’s editable via the Gutenberg editor, what’s controlled through theme settings, and what’s hardcoded. Making these decisions correctly is what separates a professional conversion from an amateur one.
2. Tools You Need Before Starting
Before writing a single line of code, ensure you have the right toolkit assembled:
- Adobe Photoshop CC — for opening PSD files, inspecting layers, and exporting assets. The “Export As” and “Generate Image Assets” features are essential.
- A local WordPress environment — I use LocalWP. It spins up a complete LAMP stack in minutes with no configuration.
- Code editor — VS Code with the PHP Intelephense, WordPress Snippets, and Prettier extensions installed.
- Node.js and npm — for running build tools. I use a Gulp or Webpack setup for compiling Sass and bundling JS.
- Browser DevTools — Chrome DevTools for CSS inspection, layout debugging, and performance profiling.
- A version control system — Git with GitHub or GitLab. Non-negotiable even for solo projects.
- WP-CLI — WordPress command line interface for installing plugins, managing users, and running database operations without leaving the terminal.
Optionally, tools like Zeplin, Avocode, or Adobe XD’s “Inspect” panel can help extract measurements, colors, and CSS values from PSD files if Photoshop’s built-in tools aren’t enough.
3. Step 1: Analyze and Slice the PSD File
Before touching code, spend focused time inside the PSD. Turn on all layers, expand every group, and build a mental model of the design’s component structure. How many unique sections are there? What elements repeat across pages? What images are decorative (CSS background) vs. content images (HTML img tags)?
Identifying Reusable Components
Look for patterns: if the same card design appears in the blog listing, team page, and case studies, that’s a single component you’ll build once and reuse. Identify your global elements — header, footer, sidebar — and note exactly which layers belong to each.
Use Photoshop’s ruler guides to verify spacing and layout grid. Most PSD designs are built on a 12-column grid (often 1200px wide with 20px gutters). Confirming the grid system before you write CSS saves enormous amounts of guesswork later.
Exporting Assets
Export images, icons, and graphics from the PSD. Rules I follow: raster images (photos, complex illustrations) export as JPEG at 85% quality. Icons and simple graphics export as SVG where possible — SVGs scale infinitely and are far smaller than PNG equivalents. Logos always export as SVG. Repeat background textures and patterns export at 1x (non-retina) and 2x (retina) sizes.
Use Photoshop’s “Export As” dialog (File > Export > Export As) rather than “Save for Web” — it offers better compression controls and supports modern formats. Name files systematically: hero-background.jpg, icon-arrow-right.svg, team-alex-chen.jpg.
4. Step 2: Write Semantic HTML5 from the PSD Layout
Semantic HTML is the foundation of accessible, SEO-friendly WordPress themes. Every PSD element maps to an appropriate HTML element — not just a generic <div>. The header section uses <header>. Navigation uses <nav>. Main content uses <main>. Articles use <article>. Sidebar uses <aside>. Footer uses <footer>.
<!-- Semantic WordPress theme header -->
<header class="site-header">
  <div class="container">
    <a href="<?php echo esc_url( home_url('/') ); ?>" class="site-logo">
      <?php bloginfo('name'); ?>
    </a>
    <nav class="primary-nav" aria-label="Primary Navigation">
      <?php wp_nav_menu(['theme_location' => 'primary', 'container' => false]); ?>
    </nav>
  </div>
</header>
Write the HTML for one complete page template first — typically the homepage. Validate it with the W3C HTML Validator before proceeding. Fixing semantic issues at the HTML stage is ten times faster than hunting them down after PHP integration.
5. Step 3: Convert Styles to CSS
With valid HTML in place, translate the PSD’s visual styles into CSS. Extract typography values from Photoshop’s character panel: font family, weight, size, line height, letter spacing. Extract colors from the swatches panel. Extract spacing from layer alignment and guides.
I structure CSS using a modular approach with CSS custom properties for design tokens:
:root {
  --color-primary: #3b5bdb;
  --color-text: #1a1a2e;
  --color-bg: #ffffff;
  --font-heading: 'Inter', sans-serif;
  --font-body: 'Inter', sans-serif;
  --spacing-base: 8px;
  --border-radius: 8px;
  --max-width: 1100px;
}

.site-header {
  background: var(--color-bg);
  border-bottom: 2px solid var(--color-primary);
  position: sticky;
  top: 0;
  z-index: 100;
}

.container {
  max-width: var(--max-width);
  margin: 0 auto;
  padding: 0 24px;
}
Use Sass/SCSS for complex projects — partials for each component, variables for the design token system, mixins for responsive breakpoints. The compiled output should be production-optimized: minified, autoprefixed, with unused rules purged.
6. Step 4: Integrate with WordPress Theme Functions
This is where your static HTML/CSS becomes a real WordPress theme. Create the mandatory theme file structure: style.css (with theme headers), index.php, functions.php, and template parts. At minimum, you also need: header.php, footer.php, single.php, page.php, archive.php, and 404.php.
The functions.php file is where theme support, widget areas, menus, and scripts are registered:
function mytheme_setup() {
    add_theme_support( 'title-tag' );
    add_theme_support( 'post-thumbnails' );
    add_theme_support( 'html5', ['search-form', 'gallery', 'caption'] );
    register_nav_menus([
        'primary' => __( 'Primary Menu', 'mytheme' ),
        'footer'  => __( 'Footer Menu', 'mytheme' ),
    ]);
}
add_action( 'after_setup_theme', 'mytheme_setup' );

function mytheme_scripts() {
    wp_enqueue_style( 'mytheme-style', get_stylesheet_uri(), [], '1.0.0' );
    wp_enqueue_script( 'mytheme-main', get_template_directory_uri() . '/assets/js/main.js', [], '1.0.0', true );
}
add_action( 'wp_enqueue_scripts', 'mytheme_scripts' );
7. Step 5: Build Gutenberg Blocks from PSD Components
Modern WordPress development requires thinking about how PSD components become Gutenberg blocks. Not every section needs to be a custom block — WordPress’s core blocks handle many common patterns. But unique design components that content editors need to add to pages should be implemented as custom blocks.
For most PSD-to-WordPress projects, I use the Advanced Custom Fields (ACF) Blocks API for custom block development. It allows building blocks with PHP and familiar ACF field groups rather than learning the full React/JSX Block API — which is overkill for most conversion projects. For projects requiring full custom block architecture, see my Gutenberg block development guide.
Register custom ACF blocks in functions.php, then create block templates in a /blocks/ directory. Each block template is a PHP file that outputs the block’s HTML using ACF field values — giving content editors full control over the component’s content while locking down its structure and styling.
8. Common Mistakes to Avoid
After reviewing dozens of PSD-to-WordPress projects done by junior developers, these are the most common and costly mistakes:
- Using pixel units for all sizing: Use
remfor font sizes and spacing. Pixel-based layouts break user accessibility settings and responsive scaling. - Hardcoding text content: Every user-facing string should be output through WordPress functions (
the_title(),the_content(), custom fields) — never hardcoded in template files. - Ignoring the mobile design: If the PSD only shows desktop, you must design the mobile experience yourself. This requires judgment, not just media queries.
- Skipping accessibility: Alt text on images, aria-labels on icon buttons, keyboard-navigable menus, and sufficient color contrast are not optional.
- Not using child themes for customization: If building on top of any existing theme framework, always use a child theme. Direct parent theme edits are lost on updates.
- Missing WordPress coding standards: Unescaped output, direct database queries, non-prefixed function names — these create security vulnerabilities and conflicts.
The step most commonly skipped — and the one that creates the most friction post-launch — is the Gutenberg block layer. Clients expect to edit their homepage headline without calling a developer. If PSD sections weren’t converted to editable blocks, they can’t. The decision of what becomes a static template versus a registered block needs to happen during PSD analysis, not at the end of the project when it’s expensive to revisit.
9. Should You Convert PSD to WordPress Yourself?
Now that you have seen the whole process, here is the honest read. Doing it yourself makes sense when you already know HTML, CSS and a little PHP, the layout is simple, and it is a learning project or a low-stakes site where time is cheaper than money.
DIY stops making sense fast when any of these are true: the result has to be genuinely pixel-perfect, it has to be responsive across every screen (remember, a PSD is one fixed-width frame — every breakpoint is something you have to invent and test), the code needs to be clean and editable in WordPress, or the site earns money and represents your brand. The trap in the middle is the “PSD to HTML” auto-converter tools: they spit out absolutely-positioned, non-responsive, non-semantic markup that is actually harder to fix than starting from scratch.
The math most people miss: paying to redo a botched DIY or auto-converted build usually costs more than having it hand-coded once. A clean PSD to WordPress conversion done by someone who does this daily ships lean, semantic code — the builds we hand over average 92 on Lighthouse — which is exactly what the auto tools and most first-time DIY attempts cannot produce.
Frequently Asked Questions
To convert a PSD to a website: first slice and export assets from Photoshop, then write semantic HTML5 markup that mirrors the design structure, apply CSS for styles and layout, add JavaScript for interactivity, and finally integrate with your CMS (like WordPress) by wrapping the HTML in theme templates.
Converting a PSD to WordPress involves: analyzing PSD layers and component structure, slicing and exporting images and icons, writing semantic HTML5 markup, writing CSS to match the PSD styles, creating WordPress theme files (style.css with theme headers, functions.php, template parts), and adding Gutenberg block support for editable content areas.
To upload a custom theme to WordPress: zip the theme folder (must contain style.css with theme headers and index.php at minimum), go to Appearance > Themes > Add New > Upload Theme in the WordPress admin, select the zip file, click Install, then Activate. Alternatively, upload directly via FTP or SFTP to the wp-content/themes/ directory.
PSD to WordPress is less common in 2026 since most designers now use Figma or Adobe XD. However, many enterprises and established agencies still deliver PSD files. The underlying conversion skills are identical regardless of source format — the process of slicing assets, writing semantic HTML, and building WordPress theme templates applies equally to PSD, Figma, XD, or Sketch sources.
Slice as little as possible. The test from Step 1 is whether an element is decorative or content. Decorative pieces — gradients, solid backgrounds, simple buttons and shapes — should be recreated in CSS, not exported as images, because CSS stays crisp on retina screens and keeps the page light. Only export what CSS can’t reproduce: logos, photographs, and complex illustrative icons (as SVG where possible). Over-slicing — exporting every button and background as a PNG — is the classic beginner mistake that bloats page weight and breaks on high-DPI displays.
A true PSD-to-WordPress conversion means hand-written semantic HTML, CSS, and PHP theme files — that’s what gives you a fast, accessible, fully-controlled theme. Page builders and no-code converters can approximate the look, but they ship 300–800KB of extra CSS and JavaScript on every page, which works directly against Core Web Vitals and accessibility. The honest answer: no-code gets you a visual match, not a true conversion. If performance, clean markup, and long-term maintainability matter, the design has to be coded by hand.
Two stand out from reviewing junior developers’ work. First, using pixel units for everything — fonts and spacing should be in rem, because fixed pixels break user accessibility settings and responsive scaling. Second, hardcoding text directly in templates instead of outputting it through WordPress functions and template tags, which makes the site impossible to manage from the admin and breaks translation. Both look fine on launch day and cause real problems the moment a client edits content or a user changes their browser font size.
No. Core WordPress blocks already handle many common patterns — headings, columns, buttons, galleries — and rebuilding those as custom blocks is wasted effort. Reserve custom Gutenberg blocks for the unique design components your content editors actually need to place themselves: a specific hero, a feature grid, a styled testimonial. Anything purely structural or decorative is better left as a PHP template part or a core block. Building custom blocks for everything inflates the timeline without giving the content team anything they will use.
A single-page conversion can take a few days; a full multi-template site typically takes one to three weeks depending on complexity, custom functionality, and how many sections need to be editable. Clean, complete source files speed it up. We give a firm timeline once we have seen the PSD and your requirements.
To do it well, yes – you need HTML, CSS, some PHP, and an understanding of the WordPress template hierarchy. No-code and automated tools exist but usually produce bloated, hard-to-maintain markup. If you are not comfortable with code, hiring a developer gives a cleaner, faster, more maintainable result.
Yes. A proper conversion is fully responsive across devices and built on clean, semantic markup with fast load times, correct heading structure, and SEO-ready meta and schema. These are baseline requirements of a quality build, not extras, and they help both rankings and conversions.
Yes. You can rebuild the PSD layout in a page builder like Elementor if you want to edit it yourself later without code. The trade-off is some added weight and builder lock-in versus a hand-coded theme. We can do either, or build custom and expose key sections for easy editing – the best of both.
Do it yourself if you know HTML, CSS and some PHP, the layout is simple, and it is a low-stakes or learning project. Hire a developer when the result must be pixel-perfect and responsive across every screen (a PSD is a single fixed-width frame, so every breakpoint has to be invented and tested), when the code needs to be clean and editable in WordPress, or when the site earns money. Avoid the middle option – PSD-to-HTML auto-converters produce absolutely-positioned, non-semantic markup that is harder to fix than starting fresh. Redoing a botched build usually costs more than hand-coding it once.
Related Services & Articles
Related design-to-WordPress services and guides.
Custom WordPress Theme Development
Bespoke, fast WordPress themes built to your exact design.
View service